Grounding is one of those things that there are plenty of myths around, but the reality is that a simple approach usually yields the best results. Grounding is a way to minimise the extraneous noise picked up by your guitar circuits, whether it’s lighting, your computer, or anything else in the vicinity. In Part 6 of our Guitar Wiring Guide, we’re going to look at how to ground a guitar, and the various approaches you’ll need to take for a variety of guitar circuits.
What is a ground connection?
Before we get stuck into things, lets understand a little more about what grounding actually is. A Ground (also called Earth) connection can cover a huge amount of things in the world of electrical engineering and it’s an essential part of guitar wiring. The ground connection links all the metal components of your guitar, returning the electrical signal to the amplifier. This removes unwanted noise, and allows the safe dissipation of electricity. Ground or Earth is typically indicated on wiring diagrams by the following symbol.

Electromagnetic interference, or EMI, surrounds us in every aspect of our lives from our mobile phones to the lights in our houses. These emitters of noise get picked up by your guitar and exaggerated by an amplifier, but with proper grounding, you can ensure that this unwanted noise is kept to a minimum. Bear in mind single coils will still hum even with proper grounding, but will still sound a lot quieter than if you neglected this process.
Les Paul/Tele Deluxe Grounding
The Les Paul/Tele Deluxe grounding example is a great lesson in that more is not always better. For proper grounding you only want to connect each component once. Grounding the same thing multiple times can cause a myriad of issues, with the most common being extra noise.

Here there's a clear path for the ground to travel along the circuit, circling to the amplifier. Each pot is grounded once, with the connection going off to the output jack.
Strat (or Star) Grounding
Looking at a Strat wiring diagram gives us a great insight into the mythos around ‘star grounding’. There are tonnes of forum topics on this subject but before we get into that, let’s understand how it actually works. Star grounding uses the Volume Pot as a central hub, whereby all the ground connections meet before exiting to the Jack Sleeve and Spring Claw. As per the diagram below we can see everything meets at the volume pot before going off to the output jack and the ground to bridge.

Star grounding is often touted as some kind of miracle cure to solve noise issues, particularly in guitars with single coil pickups, however this isn’t really the case. What it does is allow for neat and tidy wiring installations with a minimum of cables, but at the end of the day there’s no benefit over a regular ground circuit that connects all the components in a line. So long as the circuit terminates at the output jack, your guitar will be grounded regardless of how you get there.
Shielding
This brings us on to another useful proponent of grounding, shielding. Shielding is an incredibly powerful way to reduce the noise in your circuits. You can use copper foil or conductive paint to line the cavities of your guitar and the reverse of your scratch plate. Once you connect this shielding to your ground, you’ll often find a huge reduction in noise or hum. In fact we’d go so far as to say that if you have noise issues with your guitar, try this before you even begin to look at the ground circuit.

Tele Grounding
Grounding on a Telecaster gives us another useful lesson is guitar wiring. If your parts are mounted to a metal plate, in this example a Tele control plate, then you can ground everything connected to the plate by simply running one ground wire from the volume pot to the output jack. This is because the thread of your plate screws should be enough to ground your strings, since the plate is already connected to the ground via the volume pot.
How find grounding issues
If you reckon you’ve got an issue with grounding, then a multi-meter is your best friend. Relatively cheap these handy tools are a must have for anyone doing their own guitar circuits. Here’s how you find a ground problem.
- 1. Turn your multimeter to the DC resistance setting, around 20k should do it.
- 2. Place one terminal on the back of the volume pot.
- 3. Next, use the free terminal to touch every piece of metal on your guitar, referencing the reading of the multimeter as you do so.
- 4. If the multimeter reads 0.0 then you have a good connection, that is zero resistance. If it reads 0.L, then the connection is broken and you’ll need to run a ground jumper to that specific part.
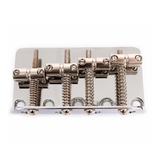
- 5. Don’t forget this applies to the bridge, any switches, and output jack sleeve of your guitar too.
- 6. If everything looks good, you can check your guitar cable to see if the ground is broken there, and make sure that you’re shielding or conductive paint is connected to the ground.

Conclusion
So there you have it! A rather complex topic boiled down to a few paragraphs. There’s a lot more that can be covered on the topic of guitar grounding, but for someone just getting started in guitar wiring, this should be plenty for you to go off into the wide world with
Learn More
If you want to understand more about single coils, check out our Strat Pickups Guide.
Start implementing your own guitar circuits with our Guitar Wiring Mods.
Learn more about guitar circuits with our Guitar Potentiometer guide.